All my work is brilliant .... all the while it stays in my head!
It's when I start to put it down on paper that the problems arise. I admire those illustrators that seem to see a perfectly formed idea in their head and then simply make it real. My process is slightly more evolutionary with tweaks and subtle changes happening around the basic concept.
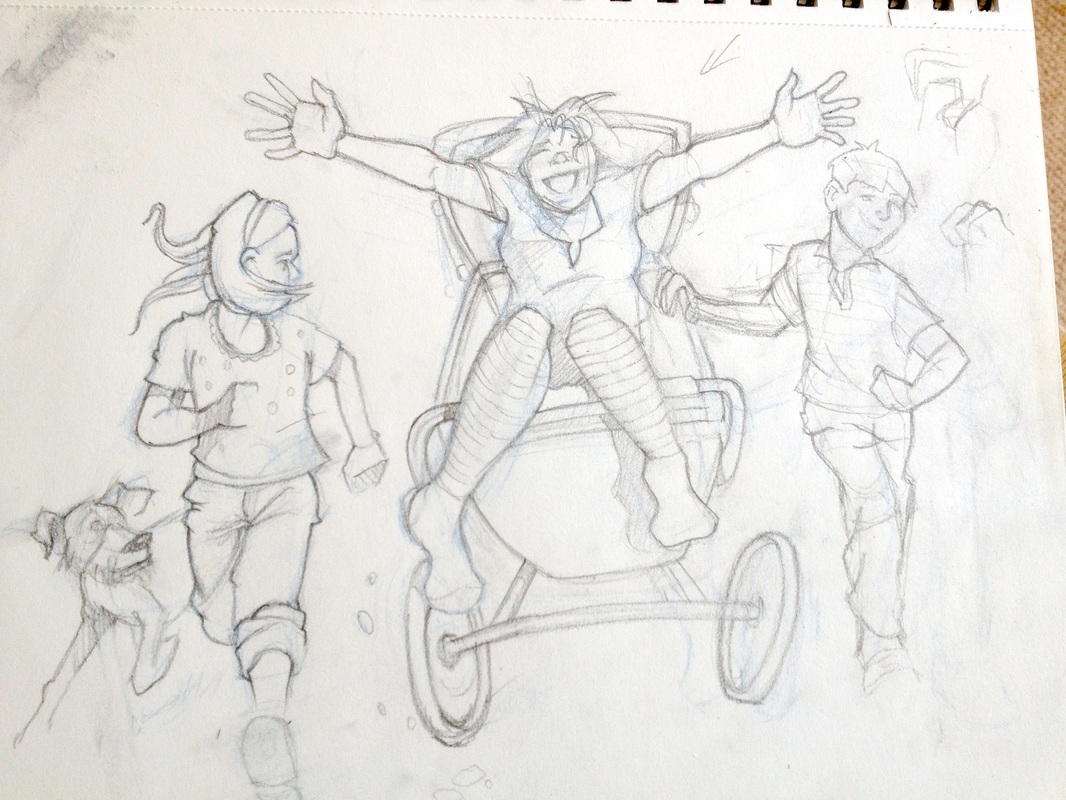
Some ideas stay as initial pencil sketches for a while (dependent on deadlines) and I can work/rework these adding a little more detail at a time.
It's when I start to put it down on paper that the problems arise. I admire those illustrators that seem to see a perfectly formed idea in their head and then simply make it real. My process is slightly more evolutionary with tweaks and subtle changes happening around the basic concept.
Some ideas stay as initial pencil sketches for a while (dependent on deadlines) and I can work/rework these adding a little more detail at a time.
Sometimes having sketched out the composition a couple of times to make sure I'm happy with the layout I'll ink out a final version. Colour and tone aren't important at this stage that can wait awhile.

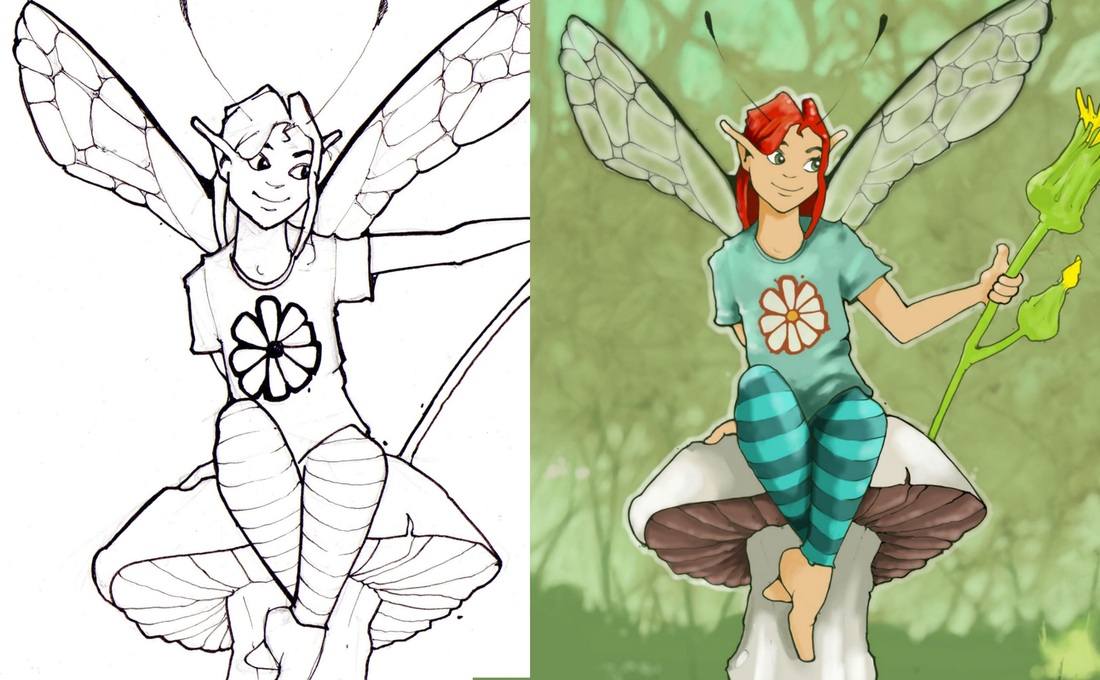
Once I've scanned the artwork I can start getting to grips with the final version. It's at this stage that I start working in my favourite application, Sketchbook Pro. I don't want to get bogged down with the minutia of the detail at this stage but still work within a pixel dimension around 2,500 x 2,500 and a dpi of 300.
Before starting any project I always find it helps to do at least a fifteen minute 'warm up' sketch. A bottle of wildflowers sat on my desk did the trick this time.
Back to the project at hand. No need to zoom into the detail yet as my first layer is just roughing out basic colours and tone. Using a wacom tablet and stylus (digital drawing tablet) combined with the drawing and painting tools of Sketchbook means that this process continues to feel like traditional artwork. The only significant difference for me is that I'm drawing on a tablet on my desk and watching the results on my monitor. The hand to eye co-ordination issue takes a while but once you get the hang of it then it becomes almost second nature. Initially working on a Quantel Paintbox back in the late 90's on breakfast TV provided a great and steep learning curve.

Sketchbook makes it easy to create a specific palette for a project to which you can add as you go. I usually set my scanned sketch to around 40% opacity and as a 'Multiply' layer. That way you can see all the other layers above this guide sketch as you work. I use a single pencil tool set to hardness/size HB/1.5 to sketch out a cleaner line art layer. The drawing tablet means that I can use the pencil in the same way I can a real pencil varying the pressure drawing from faint to hard lines. Once I'm happy with this I can discard my guide layer and start adding the layers of colour. I tend to then just use a single paintbrush set to around 25% opacity changing the size of my brush using keyboard shortcuts. So working either in traditional or digital medium for me it's all about that initial sketch.

 RSS Feed
